Best Blogger Tips

INTERNET SHUTDOWN ON MARCH 8 ACCORDING TO FBI (DNScharge infected)


Have you heard that FBI might shut down the Internet next month?


Like many question before it, this desperate warning is floating around blogs and sites. It even names a date: March 8 as the day the FBI might 
shut down the Internet.
But dude common Relax, that’s not really the case.


While yes, an untold number of people may lose their Internet connection in less than three weeks, if they do they only have vicious web criminals(hacker) to blame and certainly not the (FBI).

If people end up in the dark on March 8 it’s because they’re still infected with the malware called DNScharger.
This malware works by replacing the DNS (Domain Name System) servers defined on a victim's computer with fraudulent servers operated by the cyber criminals. As a result, visitors are unknowingly redirected to websites that distributed fraudulent software or displayed ads that put money into the bad guys’ wallet.

The worst thing about this malware is: it can also prevents security updates and disables installed security software.Due to this FBI decided to replaced the rogue servers with valid ones to help protect victims

The FBI started warning people about last November 2011 when a family of DNScharger vruses shut down a long-standing Estonian Web traffic hijacking operation that controlled people’s computer.

The agency said this would be in effect for 120 days. Had it not taken that step and simply shut down the bad servers back in November, Only infected computers would have been immediately blocked from Internet access.

So the current problem isn’t that the FBI will be shutting down the Internet when the 120 days runs out on March 8, it’s that many people and organizations haven’t removed the malware from their computers. In fact, as many as half of Fortune 500 companies and government agencies are delinquent in updating, according to some reports.

So how do you know if your computer or router is infected with DNSChanger?

FBI says: 
the best way to know is to have them checked out by a computer professional, 
which admittedly isn’t very helpful.

However, it does offer a resource paper [PDF] with guidance to make that DYI yourself, although even if you find out your system is infected the FBI says you still need a pro to scrub your machine.

Another alternative is you can use the free Avira DNS Repair Tool to figure out if a computer is using one of the temporary DNS servers. Unfortunately, the tool only works on Windows and doesn't actually remove the Trojan.

Indeed, removing the malware is a challenge, and many people will be cut off from Internet access on March 8.

KrebsonSecurity also notes that the industry and law enforcement group DNSChanger Working Group (DCWG) has a site that can help people check whether their systems are infected.

Need help? network administrators can send a request to one of the members of the DCWG and home users can use the step-by-step instructions at the DCWG Web site to see if they’re infected with the DNSChanger malware.

If you determine your system is infected you can reinstall your operating system, if you want to remain online after March 8.



By Dude

THE PIRATE BAY SOON TO LEAVE (MOST) TORRENTS.

For half  decade The leading BitTorrent site Pirate Bay soon  will no longer be able to give .torrent files  to download.

The Pirate Bay has confirmed that all torrent files being shared by more than 10 people will be erased on February 29. The decision is causing a small panic among the site’s users, but in reality little will change as all files will remain available through magnet links. The Pirate Bay Said this is merely a 
Step forward in technology 
and confirmed that the site is here to stay.


The first step in this direction will be taken on February 29, the Pirate Bay announced today.

Instead of deleting all torrent files at once, the Pirate Bay crew will start with all files that have more than 10 peers. This is to guarantee that people will still be able to download less popular files, which tend to start slower through magnets link.

While there are fears that this is the end of The Pirate Bay, nothing could be further from the truth. For users of the site the upcoming switch is expected to go smoothly.

People will be able to download all files as usual, but instead of using a .torrent file downloads will be initiated through a magnet link. The actual content of the .torrent file will then be downloaded from other people instead of the Pirate Bay’s servers.

Although it might take a little longer for less popular downloads to get started, all files will remain available. Also, users will still be able to upload .torrent files, which will be converted into magnet links by The Pirate Bay.

The Pirate Bay team said that the transition to a magnet site is 
a step forward in technology,
 and one that will make the site more resistant to being shut down.

Without torrents it takes less bandwidth to host a Pirate Bay proxy site which are used to circumvent ISP blockades in countries like Italy, Ireland, The Netherlands and Belgium. In addition, the Pirate Bay will become much more portable and thus easier to move around.

How easy it is to carry a copy of a torrent-less Pirate Bay became apparent last week, when a user reduced the entire site to 90 megabytes – small enough to fit on a tiny thumb drive. The Pirate Bay team likes the idea of a portable backup of the site and said that they are considering releasing an official version in the future.

It’s quite remarkable to see how The Pirate Bay has transformed in recent years. The site is no longer hosting a tracker, and soon .torrent files will be entirely replaced by magnet links. Despite these changes the iconic file-sharing site is picking up new users every week.

The Pirate Bay crew said that users can be assured that they have no intention of going anywhere in the near future. With or without torrents, the site is here to stay.


By Dude

SOLUTION FOR Error 105 (net::ERR_NAME_NOT_RESSOLVED): unable to resolve the server's DNS address.

Can't open a website and are getting “DNS lookup failed” in Google Chrome? 
If your answer is YES today our topic is to solve this annoying error by reading below post on how to fix Google Chrome’s DNS lookup failed error.


Google Chrome is so delight to use. 89% of user prefer this as the best browser 
– fast and secure – and with it, you may also be able to get rid of antivirus software.


Unless, if you not configured your chrome correctly, you will often get Google Chrome’s DNS lookup failed error (above image) and will not be able to open some websites. This will keep occurring for several minutes until the DNS lookup resolves. The same webpage will open correctly in Safari or Internet Explorer.


The error page displayed by Chrome (above) shows complicated instructions and this error message:
Error 105 (net::ERR_NAME_NOT_RESOLVED): Unable to resolve the server’s DNS address


This complicated instructions displayed by Chrome on the error page doesn't help.
To Fix the problem, you have to switch to using Google’s DNS on your computer instead of using your ISP’s DNS 
– steps are shown below. If you use a setting 
- obtain DNS server address automatically-that will also need to change as shown below.

SOLUTION

1. Switch the DNS addresses on your computer to Google’s DNS addresses. Set them as
 - Primary DNS server: 8.8.8.8
 - Secondary DNS server: 8.8.4.4

HOW TO DO THIS?

1. Find this network icon on your computer and click it


2. Click "Open Network and Sharing center"


3. Select the network connection that you use. 


4.
 Select Properties-> Find Internet Protocol (TCP/IP)(ipv4) from the list, select it, then click Properties.


5. Now for the last part, 
Select Use the following DNS server addresses:, and then Enter:
Preferred DNS server8.8.8.8
Alternate DNS server8.8.4.4 


Hit Ok and TADAAA your done.

I use Window Seven for this tutorial so If you use a different kind of OS or need to test the changes, follow the steps listed in Using Google DNS.

By Dude

BTjunkie SHUTDOWN FOR GOOD.


BTjunkie, one of the largest BitTorrent indexes on the Internet, has decided to shut down voluntarily today. A combination of legal actions against fellow file-sharing sites and time-consuming projects have led to the dramatic decision that takes out one the main players in the BitTorrent torrent sites.


Founded in June 2005, BTjunkie has been among the top BitTorrent sites for more than half a decade.


The site was never involved in any legal action, and to keep it that way the site’s operators decided to shut the site down for good today. The following message was posted on the BTjunkie homepage a few minutes ago:

This is the end of the line my friends. The decision does not come easy, but we’ve decided to voluntarily shut down. We’ve been fighting for years for your right to communicate, but it’s time to move on. It’s been an experience of a lifetime, we wish you all the best!

Talking to TorrentFreak, BTjunkie’s founder said that the legal actions against other file-sharing sites such as MegaUpload and The Pirate Bay played an important role in making the difficult decision. Witnessing all the trouble colleagues got into was cause for a lot of worry and stress, and those will now belong to the past.

That said, BTjunkie’s owner still thinks there might be a future for other BitTorrent sites.

I really do hope so, the war is far from over for sure, 
he told TorrentFreak.

While BTjunkie was never targeted directly by copyright holders, the site was reported to the US Trade Representative (USTR) November last year. Both the RIAA and MPAA listed the torrent index as a ‘rogue’ site that facilitated mass copyright infringement.

BTjunkie is also one of the search terms censored by Google because it’s piracy related, alongside The Pirate Bay, RapidShare, uTorrent and others.

As a result of the decision to shut down BTjunkie, one of the top 5 torrent sites with dozens of millions of users a month is no more. Judging from previous shutdowns like that of TorrentSpy and Mininova, users will quickly find a new home at other sites.

Nonetheless, it’s the end of an era.


By Dude

INTERACTIVE SERVICES DETECTION. (windows vista/seven)


Have you ever seen this button flashing on the taskbar?


When you click on the button or sometimes it popups on the screen and says:


If you click “View the message”, your screen blinks/flash and you are taken to a blank desktop with a couple of dialog boxes.


Why this Happening?

Services and system processes run in session 0. Prior to Vista/Seven, the console (first logged on user’s desktop) ran in session 0 as well. Vista/Seven  introduced session 0 isolation to protect services from elevation of privilege exploits from the console desktop. Now, the first user’s desktop runs in session 1.

Interactive Services Detection (the blinking button on the taskbar) is a mitigation for legacy applications that detects if a service is trying to interact with the desktop. This is handled by the Interactive Services Detection (UI0Detect) service. When you choose “View the message”, you are taken to session 0’s desktop and you can only interact with the dialog or message that services have tried to display on the desktop
.


Can i stop it?

You can disable Interactive Services Detection. However, you need to remember that the misbehaving service will likely be frozen waiting for user input. This would be similar to a frozen application on the desktop – the program is stuck and isn’t working.

Please note, disabling Interactive Services Detection would be similar to putting black tape over the check engine light on your car. You’re disabling the notification but you still have a problem.

Here’s how to's. This will disable Interactive Services Detection for all services:

1. Open the Services control panel. This can be found quickly by typing “services” in the Start menu search bar and clicking "Services" in the Programs section.


2. Find Interactive Services Detection in the Services list and double click it.


3. Set the Startup type to “Disabled”  click apply and hit OK.
 
The service will no longer start when you boot your computer and you will no longer see the mitigation for any service.


NOTE: disabling this service will not stop the querying service executable from prompting you on Desktop 0. All that this achieves is to "not show the question" ... there is still a window awaiting input on Desktop 0, but after disabling this you do not even know about it any longer.

By Dude

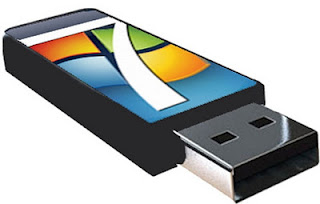
SETUP WINDOWS 7 AND VISTA FROM USB DRIVE.

'Happy new year' greetings from PCtionary , Ok since it's 2012 i would like to show one of my favorite tutorials i'd learn when i was on college, whenever im in hurry installing windows OS (Operating System) i always forgot to carry all my CD/DVD installer, But for some reason's every time i grope my pocket i feel a USB drive. 
That's why i had an idea "what if i install OS using pendrive?"  
Good Idea. So in this tutorial ill show this useful trick.


WHAT YOU NEED:
1. POWER ISO (one of my favorite)
2. USB DRIVE recommended 8gb


Step1: Create Bootable USB Drive:
  1. Start PowerISO (v4.8 or newer version, download here).
  2. Insert your USB drive/Pendrive
  3. Choose the menu "Tools > Create Bootable USB Drive". The "Create Bootable USB Drive" dialog will popup. If you are using Windows Vista or Windows 7 operating system, you need confirm the UAC dialog to continue.
  4. In "Create Bootable USB Drive" dialog, click "..." button to open the iso file of Windows 7.
  5. Select the correct USB drive from the "Destination USB Drive" list if multiple USB drives are connected to the computer.
  6. Choose the proper writing method. "USB-HDD" is recommended.
  7. Click "Start" button to start creating windows 7 bootable USB drive.
If no errors occured in the above process, you should now be all set to setup Windows 7 from USB drive!

Step 2: Configuring the BIOS:
You should now reboot and go into the BIOS configuration to boot from USB. Instructions for doing so wildly from system to system, but generally entail the following:
  1. Reboot the system.
  2. While booting (before Windows starts loading), get into the BIOS configuration screen by hitting something like F1, F2, Delete or Escape. Hotkey instructions are generally provided on the screen.
  3. Go to the section that contains your boot devices.
  4. With your USB drive plugged in, the USB drive should be listed. If it isn’t, your system might not support booting from USB. Assuming that it is supported (as is the case with virtually all modern hardware), promote your USB drive to the primary boot device.
  5. Exit from the BIOS configuration, saving all changes.
If you’re completely new to BIOS configuration, Click here for more info. Be aware though, that you can seriously screw up your system by providing incorrect settings!

Step 3: Booting and setup windows 7 from USB drive:
Assuming that you properly configured your BIOS and your USB drive supports booting, Windows 7 setup should now load. Depending on the speed of your USB drive, this may take a while.
NOTE: If it isn’t working, then double-check the following before making a scene:
  • Is your BIOS properly configured for booting from the USB device? (Is the USB device listed and does it have top priority?)
  • Have you correctly prepared the USB drive in step one? (Restart the procedure.)
  • Does your USB drive properly support being booted from? (Try another one!)
Ok! hope you've follow above intsruction and done that correctly..

By Dude

EXPERT SAYS : EXPECT MORE CYBER-ESPIONAGE THIS COMING 2012


The security industry expects the number of cyber-espionage attacks to increase this coming 2012 and the malware used for this purpose to become increasingly sophisticated.

By Dude