Best Blogger Tips

INTERACTIVE SERVICES DETECTION. (windows vista/seven)


Have you ever seen this button flashing on the taskbar?


When you click on the button or sometimes it popups on the screen and says:


If you click “View the message”, your screen blinks/flash and you are taken to a blank desktop with a couple of dialog boxes.


Why this Happening?

Services and system processes run in session 0. Prior to Vista/Seven, the console (first logged on user’s desktop) ran in session 0 as well. Vista/Seven  introduced session 0 isolation to protect services from elevation of privilege exploits from the console desktop. Now, the first user’s desktop runs in session 1.

Interactive Services Detection (the blinking button on the taskbar) is a mitigation for legacy applications that detects if a service is trying to interact with the desktop. This is handled by the Interactive Services Detection (UI0Detect) service. When you choose “View the message”, you are taken to session 0’s desktop and you can only interact with the dialog or message that services have tried to display on the desktop
.


Can i stop it?

You can disable Interactive Services Detection. However, you need to remember that the misbehaving service will likely be frozen waiting for user input. This would be similar to a frozen application on the desktop – the program is stuck and isn’t working.

Please note, disabling Interactive Services Detection would be similar to putting black tape over the check engine light on your car. You’re disabling the notification but you still have a problem.

Here’s how to's. This will disable Interactive Services Detection for all services:

1. Open the Services control panel. This can be found quickly by typing “services” in the Start menu search bar and clicking "Services" in the Programs section.


2. Find Interactive Services Detection in the Services list and double click it.


3. Set the Startup type to “Disabled”  click apply and hit OK.
 
The service will no longer start when you boot your computer and you will no longer see the mitigation for any service.


NOTE: disabling this service will not stop the querying service executable from prompting you on Desktop 0. All that this achieves is to "not show the question" ... there is still a window awaiting input on Desktop 0, but after disabling this you do not even know about it any longer.

By Dude

SETUP WINDOWS 7 AND VISTA FROM USB DRIVE.

'Happy new year' greetings from PCtionary , Ok since it's 2012 i would like to show one of my favorite tutorials i'd learn when i was on college, whenever im in hurry installing windows OS (Operating System) i always forgot to carry all my CD/DVD installer, But for some reason's every time i grope my pocket i feel a USB drive. 
That's why i had an idea "what if i install OS using pendrive?"  
Good Idea. So in this tutorial ill show this useful trick.


WHAT YOU NEED:
1. POWER ISO (one of my favorite)
2. USB DRIVE recommended 8gb


Step1: Create Bootable USB Drive:
  1. Start PowerISO (v4.8 or newer version, download here).
  2. Insert your USB drive/Pendrive
  3. Choose the menu "Tools > Create Bootable USB Drive". The "Create Bootable USB Drive" dialog will popup. If you are using Windows Vista or Windows 7 operating system, you need confirm the UAC dialog to continue.
  4. In "Create Bootable USB Drive" dialog, click "..." button to open the iso file of Windows 7.
  5. Select the correct USB drive from the "Destination USB Drive" list if multiple USB drives are connected to the computer.
  6. Choose the proper writing method. "USB-HDD" is recommended.
  7. Click "Start" button to start creating windows 7 bootable USB drive.
If no errors occured in the above process, you should now be all set to setup Windows 7 from USB drive!

Step 2: Configuring the BIOS:
You should now reboot and go into the BIOS configuration to boot from USB. Instructions for doing so wildly from system to system, but generally entail the following:
  1. Reboot the system.
  2. While booting (before Windows starts loading), get into the BIOS configuration screen by hitting something like F1, F2, Delete or Escape. Hotkey instructions are generally provided on the screen.
  3. Go to the section that contains your boot devices.
  4. With your USB drive plugged in, the USB drive should be listed. If it isn’t, your system might not support booting from USB. Assuming that it is supported (as is the case with virtually all modern hardware), promote your USB drive to the primary boot device.
  5. Exit from the BIOS configuration, saving all changes.
If you’re completely new to BIOS configuration, Click here for more info. Be aware though, that you can seriously screw up your system by providing incorrect settings!

Step 3: Booting and setup windows 7 from USB drive:
Assuming that you properly configured your BIOS and your USB drive supports booting, Windows 7 setup should now load. Depending on the speed of your USB drive, this may take a while.
NOTE: If it isn’t working, then double-check the following before making a scene:
  • Is your BIOS properly configured for booting from the USB device? (Is the USB device listed and does it have top priority?)
  • Have you correctly prepared the USB drive in step one? (Restart the procedure.)
  • Does your USB drive properly support being booted from? (Try another one!)
Ok! hope you've follow above intsruction and done that correctly..

By Dude

EXPERT SAYS : EXPECT MORE CYBER-ESPIONAGE THIS COMING 2012


The security industry expects the number of cyber-espionage attacks to increase this coming 2012 and the malware used for this purpose to become increasingly sophisticated.

By Dude

TOP 10 COMPUTER MOUSE TIPS.

 
Until now most computer users don't take full advantage of their computer Mouse's. Below are computer mouse tips and secrets that help you get the  full potential of your computer mouse and increase your  overall productivity while using computer. 

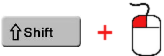
1. Shift key + mouse click
Many text editors and programs allow you to highlight all or portions of text using the Shift key  and the mouse. 
For example: place the cursor at the beginning of a paragraph, hold down the Shift key and click at the end of the paragraph to highlight the full paragraph.


2. Take full advantage of the scroll wheel
Today, everyone is fully aware of a mouse wheels ability to scroll up and down on a page. However, this wheel can also do so much more, as shown below.


>> The mouse wheel is not just a wheel, it can also be used as a button. Pressing down on the wheel will act like a third mouse button. This can be used to open a web page in a tab by clicking the wheel on any link and can also be used to close a tab by clicking the wheel on any open tab.


>> Quickly Zoom in and Out on a web page, word document, excel  spreadsheet,etc. by holding down the Ctrl key and scrolling up to zoom in and   down to zoom
 out.


>> Move forward and backwards while browsing the Internet by holding down the Shift key and scrolling up and down. Scrolling down goes back and scrolling up goes forward.


3. Select with double and triple click
Any word can be easily selected by double-clicking the word. If you want to highlight the whole paragraph, click the mouse button three times on any text in the paragraph.


4. Use the right-click
Take full advantage of the right-click any time you highlight text or wish to view the properties of an object. For example, if you highlight a file or text, you can right-click that highlighted item copy it and then right-click anywhere else to paste it.
>> If you right-click on any file or text and drag it while continuing to hold the right button, when you let go you will be given the option to move or copy that file or text. This saves you the extra step of having to right-click where you want to paste the item.
>> While in a browser pressing and holding Ctrl while clicking on any link will open that link in a new tab.

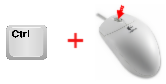
5. Ctrl key + mouse click or highlight
While holding down the Ctrl key you can left-click to select multiple objects or highlight multiple sections of text. For example, in Microsoft Windows you could hold down the Ctrl key and click to select multiple files at once. If you wanted to highlight different parts of a paragraph or web page, you could also hold down the Ctrl key and select each section you wanted to copy.
>> Mozilla Firefox users can also hold down the Ctrl key and individually click on each cell in a table they wish to copy or drag their mouse down a row to select just that row or text without selecting any of the other text in that table.

6. Use the mouse side buttons
Many new computer mice have buttons on the side of the mouse. These buttons can be programmed to do anything, however, by default the left-thumb button can be used to go back on a web page. This makes browsing the Internet more enjoyable since you do not need to move the mouse cursor to the browser back arrow button in order to go back a page.

7. Use the Windows Snap feature
Take full advantage of the Windows mouse Snap To feature, which will automatically move your mouse to buttons that appear in a dialog box. For example, if you delete a file or close a window you may get a prompt asking you if you are sure you want to perform the task. With the Snap To feature enabled, the mouse cursor automatically moves to the Ok button, so all you will have to do is click the mouse button if you agree. This saves you the time of having to move the mouse cursor over to the Ok button and then click Ok. 


>> To enable this feature open the Mouse properties under the Windows Control Panel and check the Snap To check box under the Pointer Options tab.

>> While changing this feature we also suggest looking at other available options in the Mouse settings. For example, increasing the Motion speed can also help increase your productivity while using the mouse.


8. Manage Open window with the mouse
>>Double-click the top title bar of any window to maximize a window or if it is already maximized resize it to a window. You can also double-click the icon for the window in the top-left corner of the window to close that window.

9. Move the mouse with your keyboard
Instead of using the mouse that came with your computer you can also change this function by using the number pad as a mouse.
>> Goto Control Panel >> Accessibility Options or Ease of Access
>> Click the Mouse tab.
>> Check the box "Use Mouse Keys"
>> If you like you can Change any other settings, click on the Settings button.
>> Apply and then close out of the box.
After performing the above steps you will be able to used the numeric keypad as a mouse moving up, down, left, right, and all the diagonals. In addition, you may also use the center "5" key as a left click.

10. Customize your mouse
Finally if you have a mouse with more than two buttons, 
installing the included mouse software will allow you to customize the mouse even more. 
For example: if you don't use the side buttons to move back and forth in a web page change it to something you do more often, such as switching between open windows or opening the calculator.


So that's it for today tips, Subscribed to be updated daily.

By Dude

VIEW WINDOWS SIDE BY SIDE.

If you're looking for an easy way to divide or split your screen into multiple windows your searching is over cause today i will cover this cool Free software called Winsplit Revolution. Using this small free utility you can quickly and easily split any open window in any recent version of Windows using shortcut keys and the number pad.

DOWNLOAD HERE. <<


What is it for?
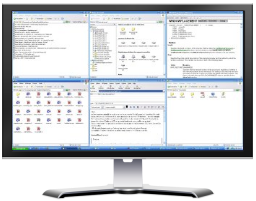
WinSplit Revolution is a small utility which allows you to easily organize your open windows by tiling, resizing and positioning them to make the best use of your desktop real estate.

What can it do? 
WinSplit is especially useful for high-end LCD screens with high resolutions because it helps you to efficiently manage many active windows. For example WinSplit is useful for owners of the Dell 2407FPW monitor. As you can see in the screenshots below, the advantages of using WinSplit is that it saves you from having to drag and drop windows by allowing you to snap windows into specific tiled configurations using simple keyboard hotkeys.


Features
  • Automated window handling (resize, move, reorganize, close tasks)
  • Shape - process association
  • Global hotkeys and clickable virtual numpad
  • Automatic startup
  • Automatic update
  • Moving a window with mouse (drag'n'go)
  • Hotkey configure
  • Layout configure
  • Fusion between 2 windows
  • Minimize/Restore by hotkey
  • Mosaic mode

Watch Winsplit in action.

By Dude

ADULT DOMAIN .XXX IS OUT NOW.


If you've been really busy this day's, you may have missed the news that the .xxx domain is now finally active and officially running,

By Dude

WINDOWS 8 BETA COMING IN EARLY 2012.


Good news for windows user's Microsoft is on track to releasing Windows 8 on a similar time frame to Windows 7, with the first Beta of the new Operating System appearing in early 2012.

Microsoft has not said officially when it will be release   
Windows 8 or even when a beta version might appear. But two cool sources claim a Windows 8 beta release is coming in the next few months.

Speaking with anonymous sources "Close to Microsoft," The Next Web says Windows 8 beta version will
launch in February. But Win rumors claims the first stable test build of Windows 8 will appear a few weeks earlier in late January, according to its anonymous sources.

Whether it appears in January or February, an early 2012 beta release for Windows 8 is not particularly astounded. Many critics expect Windows 8 to follow a similar release schedule to Windows 7.

We knew in the past  January 2009 beta version of Windows 7 has publicly released. The near-final version of Windows 7 (known as the release candidate) debuted four months later and on October 22 Windows 7 officially launched.

Windows 8 launch in 2012 has also long been expected thanks to leaked documents and public statements by Microsoft's CEO Steve Ballmer. But there are also indications that Windows 8 may be finished bit more quickly than its predecessor (awesome). 

Nokia executive recently let slip to a French newspaper that the Finish handset maker plans to release a Windows 8 tablet in June 2012.


It's not clear if the Nokia executive meant the company will start producing the tablets or will actually be selling them in stores by June. If he meant the former, that still puts Windows 8's release along a similar schedule to Windows 7. Microsoft released Windows 7 to manufacturers in June 2009 so that device makers could begin incorporating the OS into their products. Windows 7 PCs were available in October of that year.


Windows 8 beta version may not be ready yet, but Microsoft in September released a developer preview of the new OS. If you'd like to try it out, you can go to download the Windows 8 developer preview.


By Dude